The thought of roasting a whole turkey can send shivers down even the most seasoned chef's spine. The common anxieties? Dry breast meat, undercooked dark meat, and an endless wait as the oven churns. But what if there was a simpler, faster, and undeniably superior way to achieve a show-stopping bird with unbelievably crispy skin and succulent, juicy meat? Enter the spatchcock turkey, a game-changing technique that promises to revolutionize your holiday cooking and make you a true turkey roasting hero.
Spatchcock Turkey: A Game-Changer for Holiday Roasts
For decades, traditional whole-roast turkey methods have dominated holiday tables, often leaving cooks in a frantic cycle of basting and worrying. The problem? A whole turkey is an unevenly shaped bird. By the time the dark meat (thighs and legs) reaches its tender perfection, the delicate breast meat is often overcooked and dry. This culinary dilemma is precisely what the spatchcock turkey method elegantly solves.
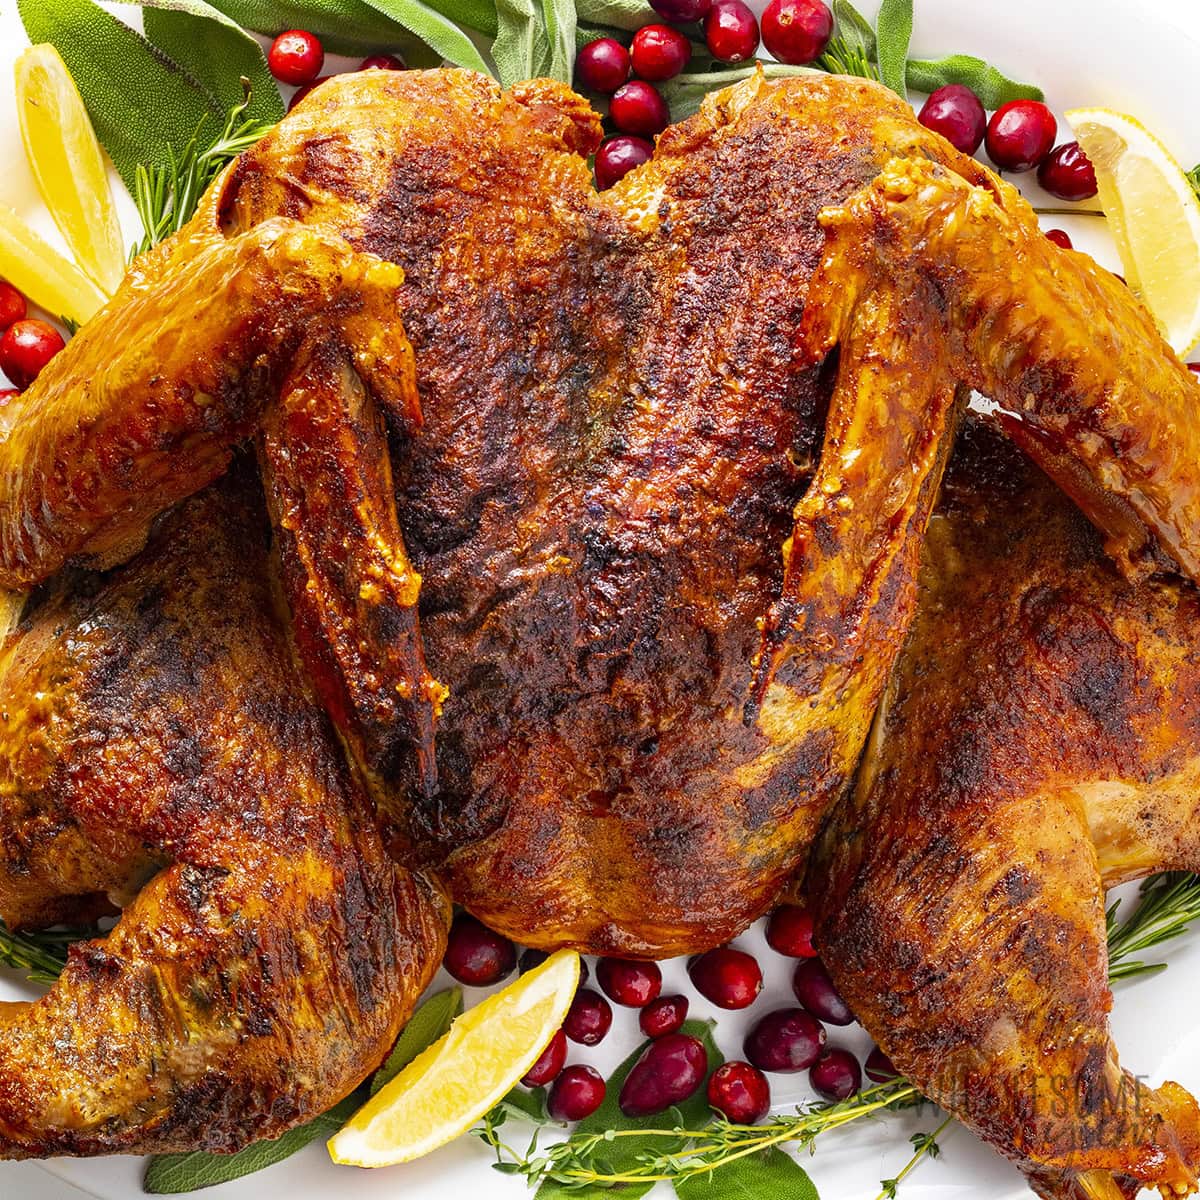
Also known as a butterflied turkey, the spatchcock technique involves removing the turkey's backbone, allowing the entire bird to be flattened. This simple, yet brilliant, alteration transforms the turkey from an awkward, uneven mass into a uniform canvas for heat. When laid flat, the turkey roasts skin-side up, ensuring every inch of skin is exposed to the oven's radiant heat, leading to an unparalleled crispiness that's simply unattainable with traditional methods.
The shift from a three-dimensional bird to a flat surface also dramatically reduces cooking time – often cutting it in half! Where a conventional turkey might demand three hours or more of oven time, a spatchcock turkey can be ready in a mere 1.5 to 2 hours, depending on its size. This not only frees up precious oven space but also grants you more time to create cherished holiday memories instead of fussing over the bird. For a deeper dive into the unparalleled juiciness this method delivers, you might find our article Why Spatchcock Turkey is Your Best Bet for a Juicier Holiday particularly insightful.
Why Spatchcocking Reigns Supreme: Unpacking the Benefits
- Crispy Skin, Every Time: By flattening the bird, the skin is fully exposed to direct heat, eliminating steamy pockets and promoting even browning and incredible crispness across the entire surface.
- Unrivaled Juiciness: This is arguably the biggest win. With the turkey laid flat, the breasts and thighs are on the same level. This uniform thickness means they cook more evenly, finishing around the same time. No more dry white meat and undercooked dark meat – just perfectly tender, juicy results from wingtip to drumstick.
- Drastically Reduced Cooking Time: As mentioned, expect to shave significant time off your roasting schedule. This makes the method perfect for busy holiday hosts or even for a weeknight family dinner if you're feeling adventurous with a smaller bird.
- The Gravy Goldmine: Don't discard that backbone! It's a concentrated source of rich flavor, perfect for simmering into a quick, deeply savory stock that will form the foundation of the freshest, most flavorful gravy you've ever tasted.
- Enhanced Flavor Penetration: With the bird opened up, seasoning can reach more surfaces, including under the skin, infusing the meat with deeper flavors.
- Easier to Carve: Once cooked and rested, a flattened turkey is surprisingly easier to carve, making serving a breeze.
Mastering the Spatchcock Technique: Your Step-by-Step Guide
While the benefits are clear, the idea of spatchcocking might seem intimidating at first glance. Rest assured, it's a remarkably straightforward process that requires only basic tools and a bit of confidence. Food writer Mark Bittman famously popularized this method in 2002, introducing home cooks to a "45-minute roast turkey" and solidifying spatchcocking's status as a culinary game-changer.
Essential Tools
You don't need fancy gadgets. All you'll require are:
- Heavy-duty kitchen shears: These are non-negotiable for cleanly cutting through bone.
- A sharp chef's knife: Useful for any final trimming or to assist with the breastbone crack.
- A large cutting board: For hygiene and stability.
- A sturdy baking sheet with a wire rack: Essential for air circulation during cooking and pre-prep.
The Butterflying Process (Conceptually)
- Prepare Your Workspace: Lay out your turkey breast-side down on a large, clean cutting board. Pat it dry with paper towels.
- Locate the Backbone: It runs the length of the bird, from the neck cavity to the tail.
- Cut Along One Side: Using your kitchen shears, carefully cut along one side of the backbone, working from the tail end up towards the neck. Be firm but gentle.
- Cut Along the Other Side: Repeat the process on the other side of the backbone. Once both cuts are made, the backbone should lift out easily. You can reserve this for stock.
- Flatten the Bird: Flip the turkey over so it's breast-side up. Using the heel of your hand or a clean, sturdy implement, press down firmly on the breastbone until you hear and feel it crack. This will allow the turkey to lie completely flat. Some guides recommend making a small incision in the cartilage between the breasts to help it lie flatter.
That's it! Your spatchcock turkey is now ready for seasoning.
Prepping for Perfection: Drying & Seasoning
This stage is crucial for that coveted crispy skin. Pat the entire turkey, inside and out, thoroughly dry with paper towels. Moisture is the enemy of crispiness. Now, for seasoning:
- Salt is Key: Don't be shy. Season the turkey all over with a generous amount of salt, even lifting the skin gently to apply salt directly to the meat underneath. This helps draw out moisture and seasons the meat deeply.
- Flavorful Rubs: A delicious savory, sweet, and smoky rub can elevate your turkey. Think herbs like rosemary, sage, and thyme, combined with garlic powder, paprika (smoked paprika for that smoky note), a touch of brown sugar, and black pepper. Apply the rub generously over and under the skin.
- The Overnight Advantage: For the absolute crispiest skin, after seasoning, place the turkey on a wire rack set over a baking sheet and refrigerate it uncovered for 12-24 hours. The circulating air will further dry out the skin, preparing it for a truly spectacular roast.
Cooking Your Spatchcock Turkey to Golden Perfection
With your turkey prepped, the final step is roasting it to a golden, juicy finish. Whether you prefer a high-heat blast or a slower, more controlled approach, the spatchcock method adapts beautifully.
Roasting Temperatures and Times
While traditional turkeys bake low and slow, a spatchcock turkey thrives in higher heat, which contributes to the reduced cooking time and crispier skin. A common approach is roasting at 425-450°F (220-230°C) for the majority of the cooking time, possibly lowering the temperature slightly if the skin is browning too quickly. For a 12-15 pound bird, expect it to take between 1.5 to 2 hours.
Alternatively, the spatchcock method also works wonderfully for low-and-slow smoking at 225-250°F (107-120°C), offering a different flavor profile.
Achieving Optimal Doneness: The Thermometer is Your Friend
The most critical tool in your arsenal is a reliable meat thermometer. Visually guessing doneness is a recipe for disaster. Here are the target temperatures:
- Breast Meat: Aim for 165°F (74°C) when inserted into the thickest part of the breast without touching bone. Some recipes suggest pulling at 150-155°F, allowing carryover cooking to bring it to 165°F, but for safety and peace of mind, 165°F is the standard.
- Thigh Meat: Aim for 175-185°F (79-85°C) when inserted into the thickest part of the thigh, again, avoiding bone. The dark meat benefits from a slightly higher temperature for optimal tenderness.
Remember, the beauty of the spatchcock method is that these different temperature zones are likely to be reached much closer in time, preventing one area from drying out while another finishes cooking. For detailed guidance on timing, our article Spatchcock Turkey: Halve Your Roasting Time for Perfect Results offers more specific insights.
The All-Important Rest
Once your turkey reaches its target temperatures, resist the urge to carve immediately. Transfer the turkey to a clean cutting board and tent it loosely with foil. Let it rest for at least 20-30 minutes. This crucial step allows the juices to redistribute throughout the meat, ensuring every slice is as succulent as possible. Skipping this step is one of the quickest ways to lose all that hard-earned juiciness.
Embracing the spatchcock turkey method isn't just about cooking a turkey; it's about transforming your entire holiday experience. It's about achieving culinary excellence with less stress, more flavor, and truly unforgettable results. Whether you're a novice cook or a seasoned host, this technique offers a foolproof path to crispy skin, juicy meat, and a meal that will be talked about long after the last bite.
